|
|
| DEPTH CHARGES MARK 6 and MARK 7 |
| PART II |
| CHAPTER V - INSPECTION AND TESTING GENERAL INSTRUCTIONS |
|
TESTS OF MARK 6 AND MARK 6 MOD. 1 PISTOLS (MARK 2 MOD. 1 SET) |
|
6. The standard functional test procedure for these pistols using the Mark 2 Mod. 1 test set is as follows: |
|
(a) Remove detonator and safety cover if attached. See that the detonator collar and detonator holder are in place. |
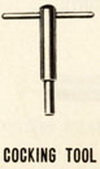 |
(b) Cock the pistol. Use the cocking tool provided in the Mark 2 Mod. 1 test set for this purpose. In the cocking operation push inward on the cocking tool until its shoulder contacts the detonator holder. Repeat the operation several times to insure that the firing plunger lock balls are firmly seated on the beveled edge of the guide tube bushing. Alt-hough the premature firing of an improperly cocked pistol in the test set, without attached detonator, will not have harmful results, acciden-tal firing of detonator from this cause has resulted in serious injury to personnel. THEREFORE THE COCKING OPERATION SHOULD ALWAYS BE PERFORMED WITH CARE. |
|
(c) Turn the index pointer back and forth several times through the full range from "safe" to "30". See note Chapter IV paragraph 19(b). |
|
(d) Set the index pointer at "100". Set the pointer in deep firing mechanism of Mark 6 Mod. 1 pistol at "0-300". |
|
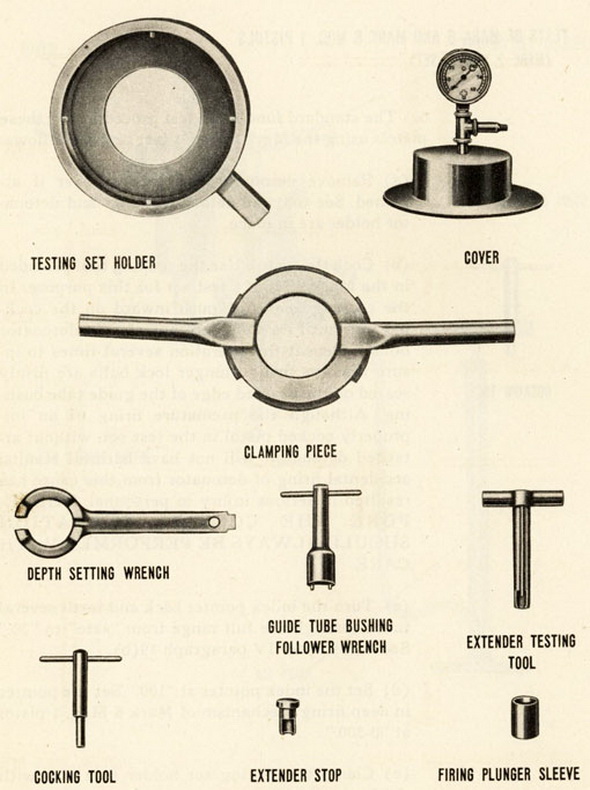
(e) Clamp the testing set holder in a vise the larger opening up. Assembly the parts in the holder as follows: |
|
(1) Rubber washer (largest outside diameter). |
|
(2) Depth charge pistol. |
|
(3) Rubber washer (smallest outside diameter). |
|
(4) Cover. |
|
(5) Clamping piece. |
|
|
|
TESTING SET MARK 2 |
|
|
|
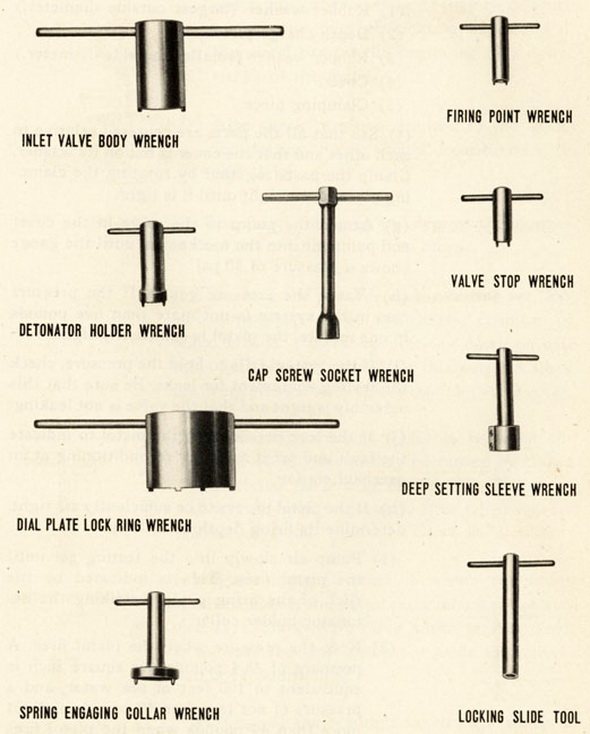
TESTING SET MARK 2, MOD. 1 |
|
(f) See that all the parts are centered relative to each other and that the cover is flat on its washer. Clamp the parts together by rotating the clamping piece to the right until it is tight. |
|
(g) Attached the pump to the valve in the cover and pump air into the mechanism until the gauge shows a pressure of 30 psi. |
|
(h) Watch the pressure gauge. If the pressure loss in the system is not more than five pounds in one minute, the pistol is sufficiently tight. |
|
(i) If the system fails to hold the pressure, check the testing equipment for leaks. Be sure that this assembly is tight and that the valve is not leaking. |
|
(j) If the leak persists, tag the pistol to indicate the fault and set it aside for reconditio-ning at an overhaul station. |
|
(k) If the pistol proves to be sufficiently air-tight, determine its firing depth as follows: |
|
(1) Pump air slowly into the testing set until the pistol fires. This is indicated by the click of the firing plunger striking the detonator holder collar. |
|
(2) Note the pressure when the pistol fires. A pressure of 44.4 pounds per square inch is equivalent to 100 feet of sea water, and a pressure of not less than 40 pounds and not more than 49 pounds when the pistol fires indicates a satisfactory pistol. To the the excat reading at the instant the pistol fires, watch the gauges closely. It may be difficult to stop pumping immediately, especially if the pistol fires at the beginning of a down stroke of the pump. |
|
(3) Also check pressure required to fire at 300 foot setting. Firing should occur bet-ween 10 and 15 psi. |
|
(l) Disconnect the pump and depress the plunger in the valve to allow the air to escape. |
|
(m) Remove the pistol from the testing set. Release entrapped air in hydrostatic chamber of Mark 6 Mod. 1 pistol by pressing down on ball valve with a tool provided for this pur-pose. Cock the firing plunger and replace the inlet valve cover. |
|
NOTE: High firing pressure recorded for Mark 6 Mod. 1 pistol may be caused by clo-sed ball valve in deep firing mechanism. This valve should be open to pressure flow when pointer is set at "0-300". |
|
(n) If the firing pressure is within the limits specified above, the pistol is satisfactory for service. If it is not within these limits, tag the pistol to indicate the fault and set it aside for calibration or reconditioning. |
|
NOTE: If the readings taken on a series of tests are consistently high or low, check the gauge on the testing set for accuracy. |
|
|
|
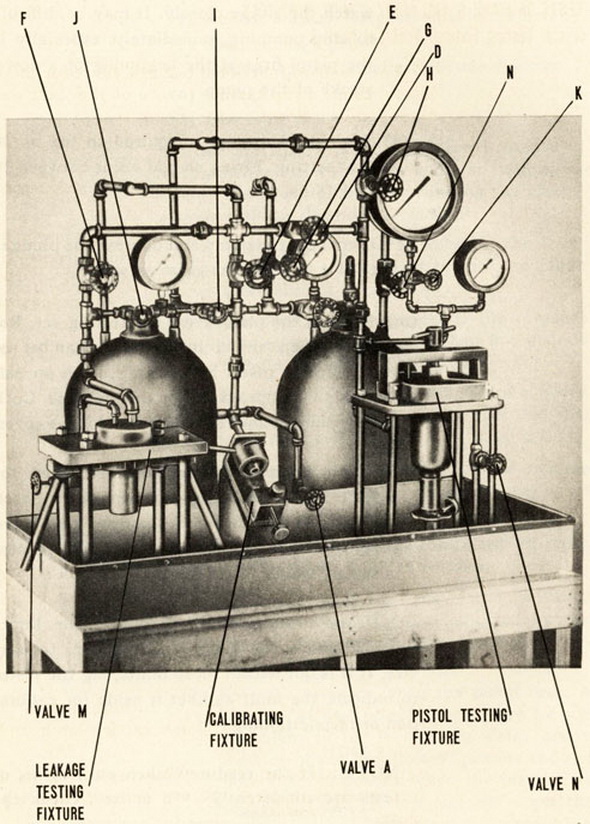
TESTING FIXTURE |
|
|